|
||
|
Advice_ FAQ _Media _Resources _Performance _Tech Help _Data _Forum _Search _Contact |
|
Plenum Removal |
|
The Plenum Job What this write-up will cover:
Quick reference torque values (Lb/Ft) Plenum Bolts- 9-11 Throttle body- 1st step: 6.5-8, 2nd step 13-18 (see FSM page EM-6) IAC- 6.2-8 PCV valve- 14-22 Knock sensor- 12-15 EGR valve bolts- 15-20 EGR Tube- 29-36 Coolant heads (that cover the knock sensors)- 10-12 TOOLS YOU WILL NEED - Every 10mm tool you can find. This includes sockets, wrenches, gear wrenches, etc. You will use them. - Assorted pliers, cresent pliers and needle nose pliers are the best - Band-aids - Torque wrench - Plenty of 3/8 and ¼ inch extensions - Hose puller- I couldn’t find one, so I made one of my own. Simply take an old screw driver (thin shafted) and bend it about an inch down from the tip. I had to use a blow torch and a vise - A really sharp knife to cut through hoses - 6mm allen socket - Extendable magnet - RTV Here is a list of the size of most of the fasteners (note all are 10mm unless otherwise noted)
Removing the plenumBefore I get started into
any of this, I am going to assume you have already removed all of the
plastic cladding and the rubber intake tube.
That is all self obvious, except for the passenger side you
must remove the upper radiator hose.
I tried to get around it, but it cant be done.
For this reason, I drained about 2 or 3 cups of coolant from
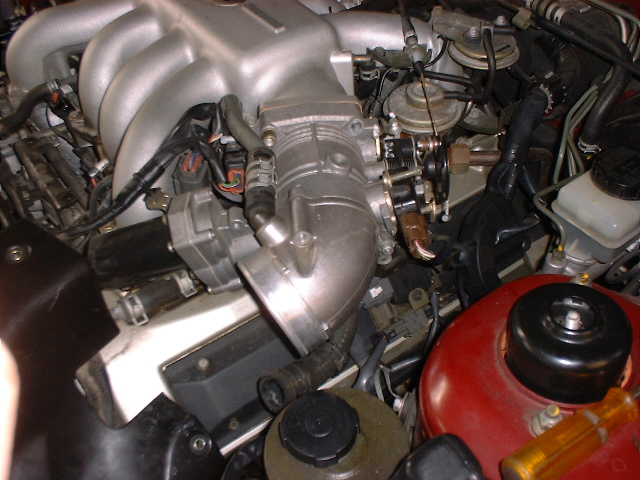
the radiator. You should look like this.... The throttle body This is probably one of the easiest parts of the job. Once you get all the connections undone (its all easy to figure out), you undo the 4 allens, and it will fall right off. When you get it undone, you will see 2 larger hoses, and 2 small hoses. The one on your left I was able to get off, the one on the passenger side I cut. The smaller ones will pull right off. Mine weren’t brittle, but Im going to replace those because I can see one of those splitting very easy, as they are very tiny. THe throttle cable slides out by pulling the cable foreward out of the guide, and it slides right out.
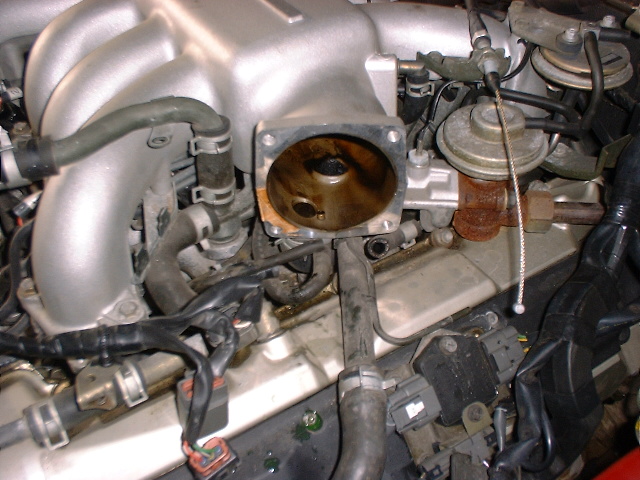
As you can see in the picture, I got the bigger hose off to the left hand side off, and I cut the right hand one just after I took the picture. Those 2 smaller ones coming out of the side of the TB will pull right off.
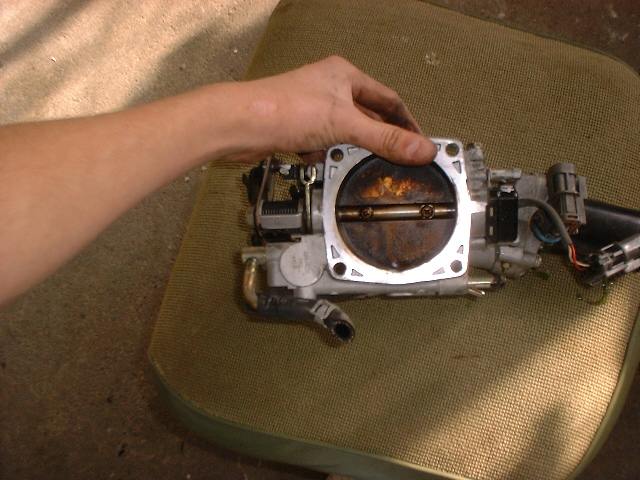
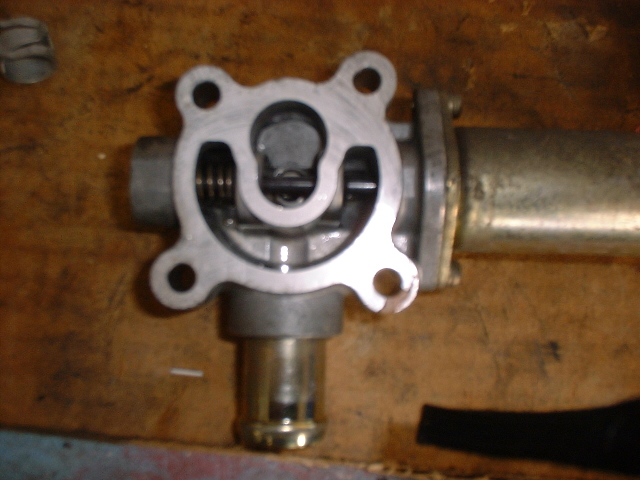
Then you are left with this Here is what the back side of my throttle body
looked like, fresh off the car.
REMOVING THE PLENUM First of all, you have to undo all of the plenum bolts. 16 in all, 10mm. Easy enough, right. It gets better, dont get too excited. Go along and undo all of the really obvious things, like the accelerator cables on the passenger side. There is a rocker cover hose on the passenger side, a PCV hose going from the PCV valve (PCV valve is located right near the coolant filler neck), and a few other blatently obvious things. You must also remove the EGR valve. Undo the bolts holding it on (12mm) and you can then swing it aside. You must also remove the EGR temp sensor. Also, my brake booster hose was shot, and it didnt have a chance at coming off, so I just cut it right off the bat. Now the fun begins. You must work on the
IAC. What I did is I removed the IAC from the plenum.
There are 4 bolts holding it on, and now the IAC is no longer an
obstruction to removal of the plenum. PLEASE DONT GO INTO THIS
THINKING YOU CAN SAVE HOSES LIKE I DID, BECAUSE YOU CANT!!! CHOP
AWAY!!! Shred that IAC hose so all 3 connections are free (and
say goodbye to $26 too). There is also another hose near the IAC
that plugs into the plenum that must be cut too. Fortunately,
this has a screw type hose clamp on it, unlike the IAC hoses.
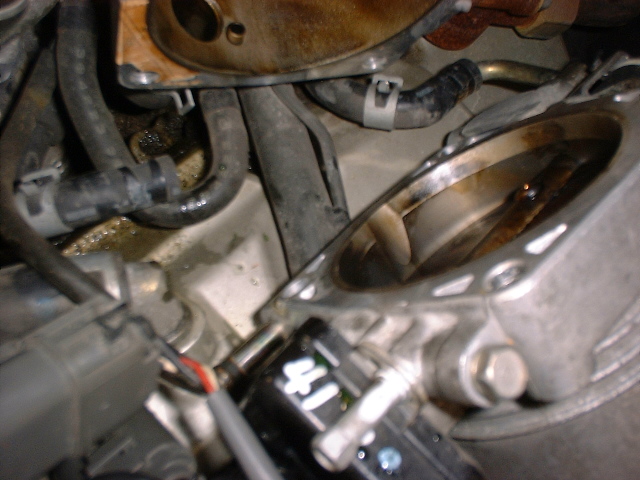
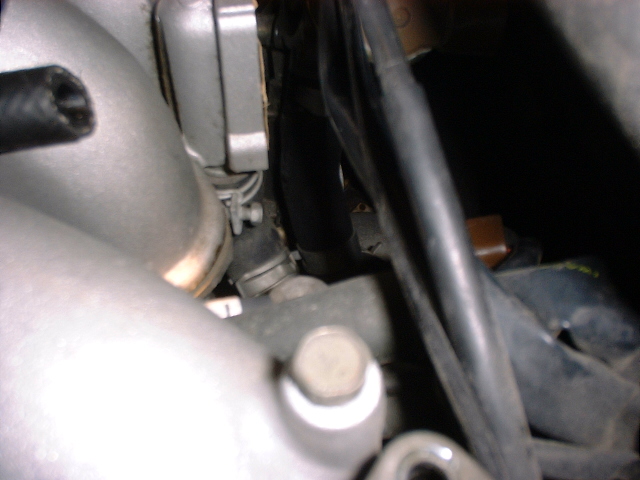
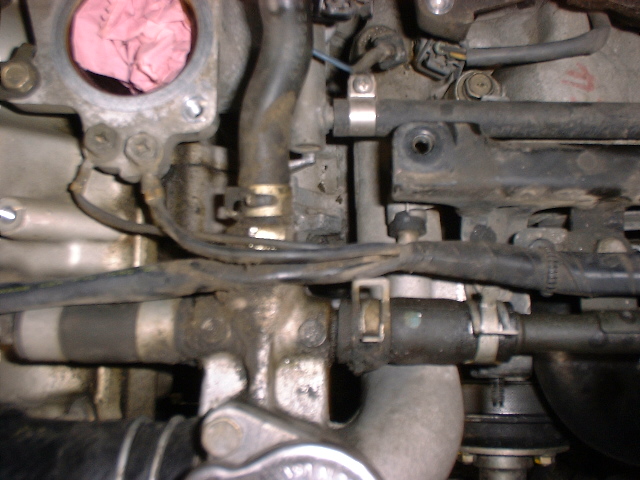
Cut that baby off too. Here it is: You could probably leave that clamp on, as there is a piece of metal in the hose, and the clamp probably just gets in the way. Here is a shot under the plenum, partially off
There is also a little tiny coolant hose that connects right near the EGR.....
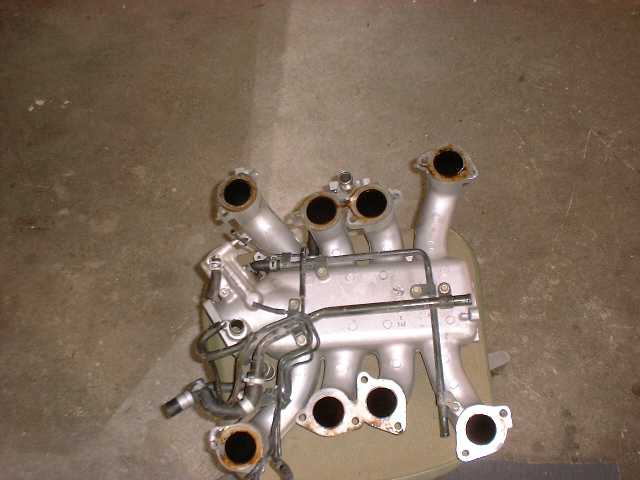
Here is a shot of the underside of the plenum... Note that my engine is a CALIFORNIA model, so there may be more little hoses on mine.....
You should have the plenum off right now.... If you dont, go through and make sure that all of your brackets are off..... Also, the O2 sensor wire is tie wrapped to the plenum. There are a few brackets way in the back that are kind of hard to see... Whatever you do, dont force anything (and bend things like i did). ALSO, BE SURE TO SAVE THE OLD PLENUM GASKETS AS YOU NEED THE METAL RINGS INSIDE THEM!!!! I cant also stress the importance of plugging up the runners with paper towels or a rag..... You will be devastated when something drops down there.
Now that the plenum off, let the games begin.... Start off by cleaning the throttle body, and then the IAC... When cleaning the IAC, it really helps to have compressed air... Spray some carb cleaner down there, let it sit and blow it out... Heres a shot of mine cleaned....
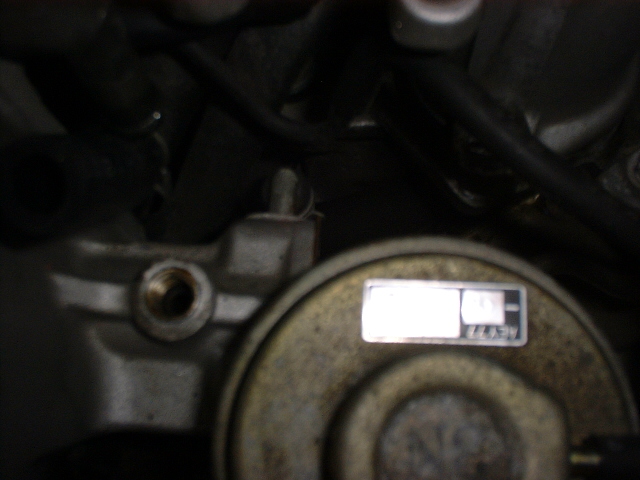
Now its time to replace the PCV valve... Here is a shot of it...
All you have to do is undo the old one and put in the new one... Very simple
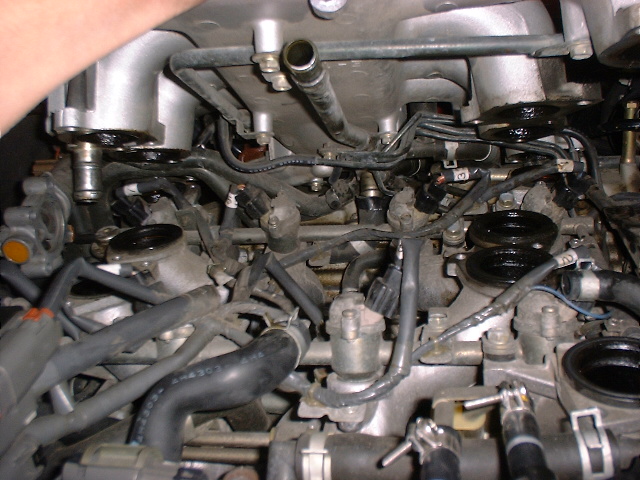
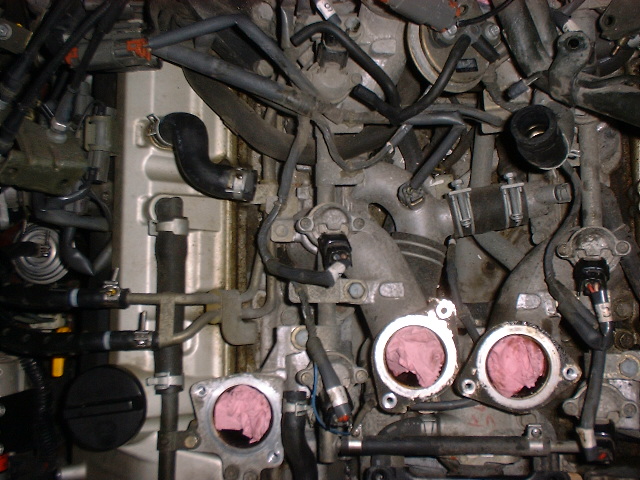
Now you are ready to start digging in the valley. Here is a shot of what you will see when you first look under there.
At this point, you can ohm the injectors. Simply undo the connectors, and stick your tester probes on the 2 leads.... They should be 10-14 ohms. If not, then I would replace them.
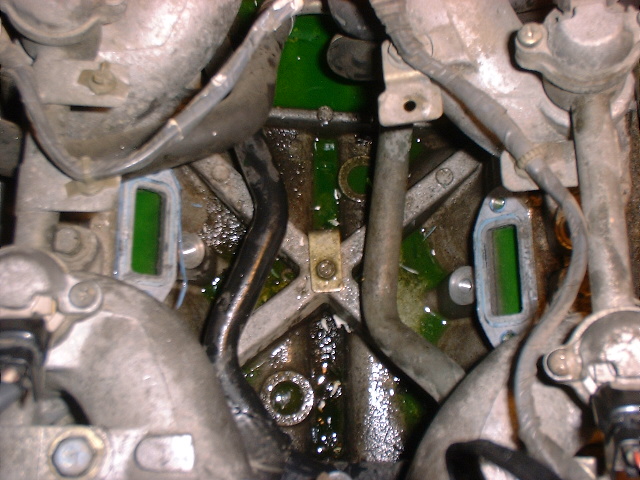
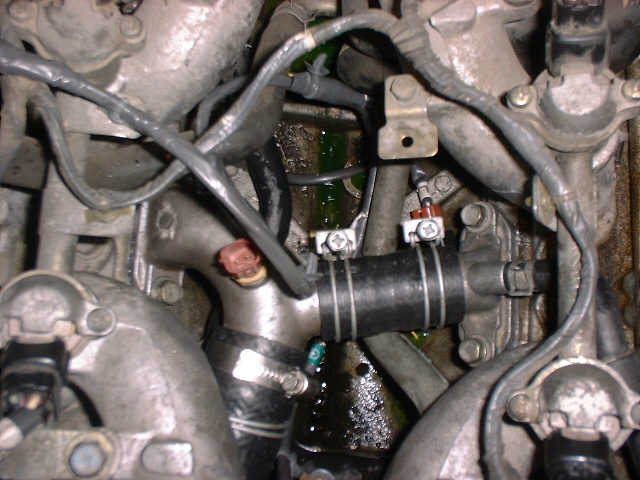
Now its time to work on the knock sensors. What you must do is remove that Y shaped apparatus (with the connnector on it, you may or may not have one because mine is a CALIFORNIA model). Best thing to do is cut the hoses and then get them off all the way. Be ready because the flood gates will open when you cut and remove the hoses. Once the hoses are off, simply loosen the bolts. When thats done, it will look this. In this shot, I have already removed my knock sensors.
I would suggest getting a turkey baster or something like that to suck up all the excess coolant. Now just remove the knock sensors, harness connected, and pull everything out. I cut a lot of the little plastic things that hold the harness in place. Note that the torque value on the knock sensors are VERY important. When it comes time to put the coolant hoses you removed, you must hook it all up as a single unit. This was the most hell raising part of the job, this still gives me terrible flashbacks. I had to twist one side and maveuver it all down there. Do not forget to apply RTV to the back side of the Y shaped thing.. Apply it in the groove as it indicates. I smeared some extra on there to be safe.
Here is a shot with everything put back together. In this shot I didnt completely tighten the clamps.
Now, assuming you are all done underplenum, then its time to put it back together.... Fortunately, I found that it was marginally easier to put the plenum back on then it was to take it off.. Mainly because you know where and how everything connects. Unfortunately, at this point I was so pissed from doing the knock sensors I didnt take any pictures for this. Fortunately, I dont think it would have done much good. The way I put it back on was to start at the back of the plenum (IAC and the other plenum hose) and work my way around, connecting every hose. I did brackets after I had the plenum bolts back on. Once you have all the hoses connected AND THE EGR HOOKED UP, put the plenum bolts in. Tigten them just finger tight, as you need to move it around, and if you tighten them it will throw the other side out of alignment. IT IS IMPORTANT YOU DONT OVER TORQUE THE BOLTS. Even slightly overtightening can break the fragile bolts. Once you have it all tightened down, put the TB on, accelerator cables, etc. Start it up and pray you didnt leave something undone.
SUPPLEMENTAL INFORMATION http://forums.nicoclub.com/zerothread?id=46162 When cleaning the plenum and valve covers, I found that paint and varnish remover works by far better than anything else. Put it in a spray bottle and go crazy. You will want to wear rubber gloves, as its very bad on your hands (it will burn the cuts that you have on your hands). TB cleaner works well too, but you must use a lot more to accomplish the same thing. Be sure not to spill any on the painted surface of the valve covers. I would use only TB cleaner on the TB. Be sure to clean out the EGR port on the plenum. To remove the drivers side valve cover, you must remove the EGR tube assy. I left the valve connected to the tube. I was able to loosen the manifold bolt by pulling on the valve. You will feel it free itself, and keep moving it until there is quite a bit of play. You can then reach down from the top and loosen the bolt. To put it back on, I put it in position as best I could, then I jacked up the car and aligned it and put in the bolt finger tight. I didnt worry about fully tightening it on the exhaust manifold, because its really not necessary since its fully secure when you tighten it to the plenum. When installing things, like the throttle body, be sure to align everything first before bolting it down. I missed a connector, and I had to undo the TB and dig it out. MAKE SURE EVERYTHING IS ALIGHNED AND HOOKED UP BEFORE YOU FASTEN THINGS DOWN, UNLESS YOU CANT! If your Q is your primary source of transportation, be sure to have an extra running car available. Chances are you will need to run and get a new tool from sears or something like that. Remember, if you get stuck or frustrated, be sure to have something to take out the anger on (I had an old pair of pliers). Also, I left the plenum cleaning for when I got stuck. Id also like to give a special thanks to everyone on NICO for helping me out. Also, Id like to thank the people at Griffith's Wawasee Marina (my aunt and uncles) for letting me use their shop
More: http://forums.nicoclub.com/zerothread?id=212964
|